Ignite Greenhouse Gateway
Ignite Greenhouse is an open source ARDIC project. The purpose of this project is to collect information on the environment and soil status in the greenhouses and inform the user in a single area.
ARDIC is publishing source codes to enable anyone to use this technology and to increase the yield of products in the greenhouse.
Gateway App
The codes in this section are the codes that work in gateway. We will talk about how to use these codes and the installation steps. After these steps, gateway will be ready for use.
1. Preparing for Implementation
Step 1 : Download the Project
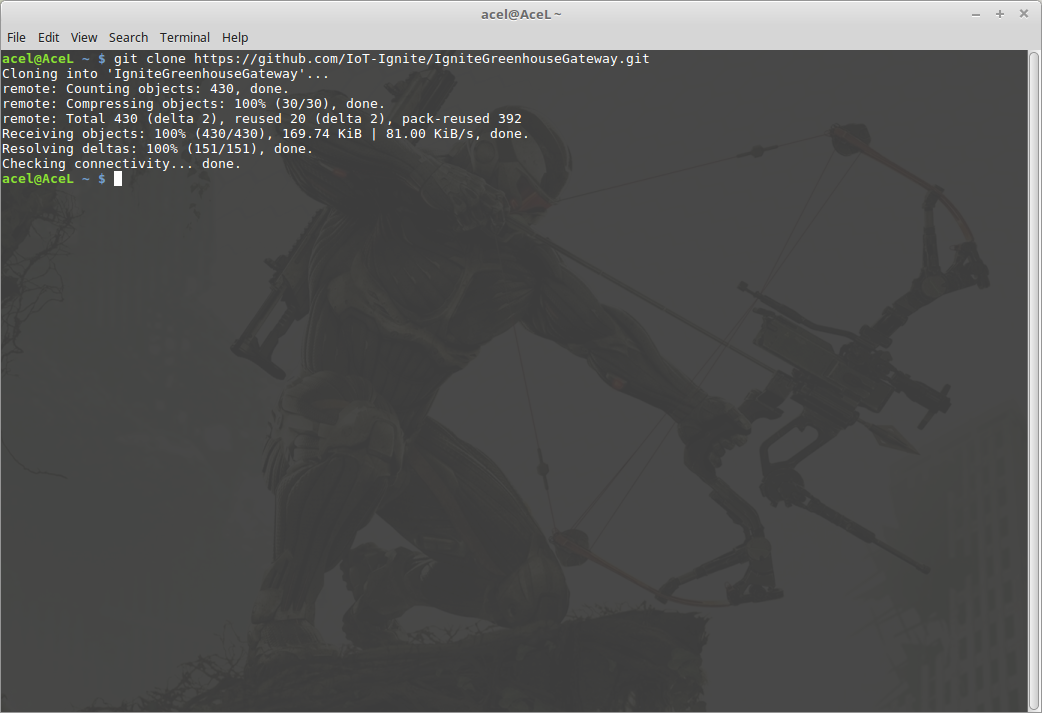
Open the terminal and enter the following command.
git clone https://github.com/IoT-Ignite/IgniteGreenhouseGateway.git
Thus, the project will be located at the location you specify.
Step 2 : Prepare Compiling Environment
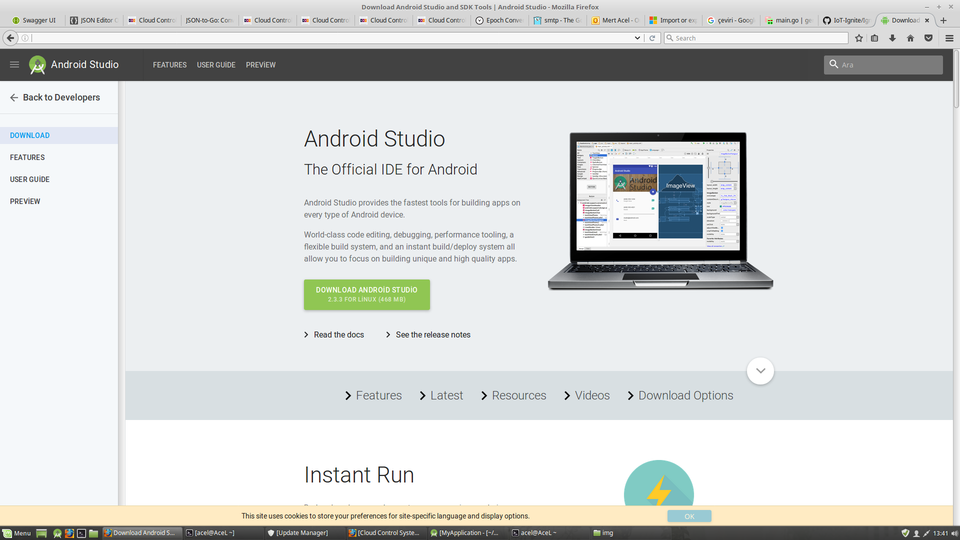
If you don't have Android Studio on your computer, go to https://developer.android.com/studio/index.html to download the program and perform the installation.
Step 2.1 : Open project
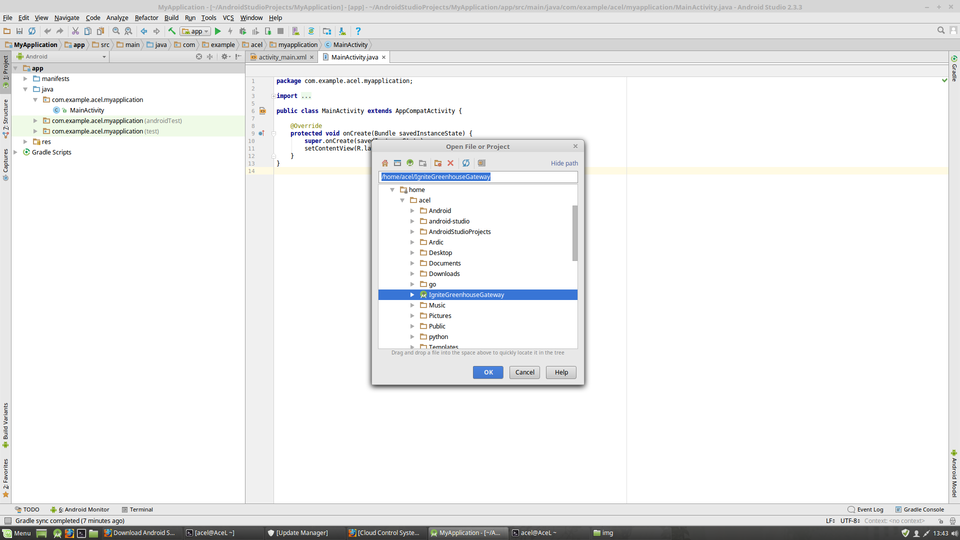
Open Android Studio. After that click on File > Open and then select the file we downloaded in the pop-up window and click the OK button.
Step 2.2 : Creating Application Signature
We have to compile the project. To compile, we first need to create an application signature.
To compile with the signature we click on Build > Generate Signed APK...
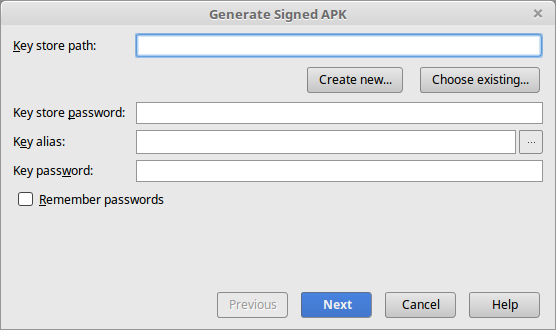
If there is no signature you created earlier, we click "Create new ..." button in the pop-up window.
We enter information on the screen.
Key store path : The path of the folder you will sign
Password : Signature password
Alias : Signature name
Password : Password
Click the OK button.
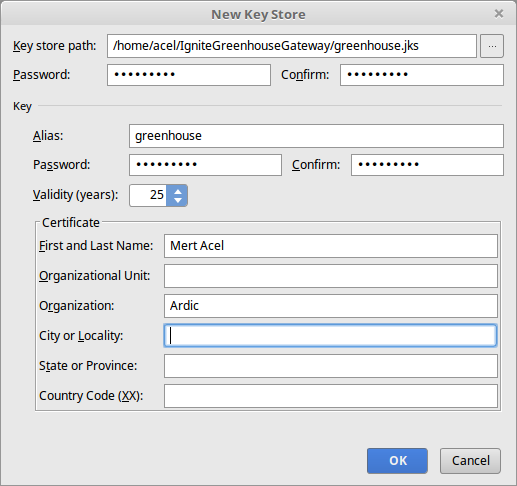
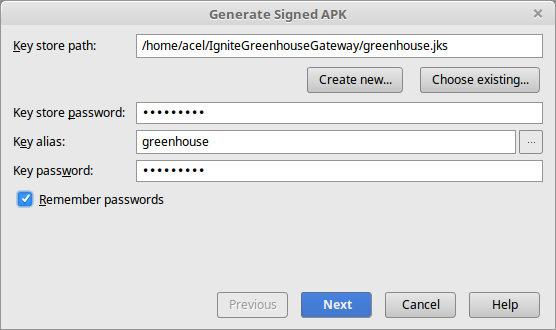
Once you have entered the information, your project will be ready to be compiled. The information we create comes on the screen automatically. Press the Next button.
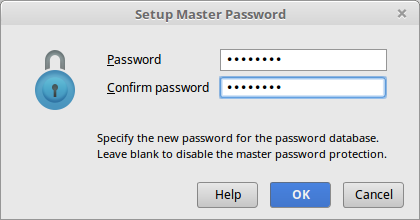
The password screen comes up. We enter our password and press the OK button.
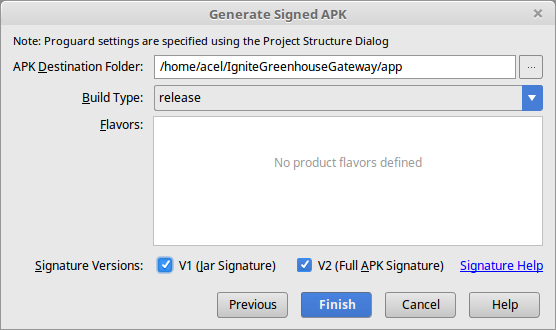
We're on our last screen. Once you click Finish button, our ".apk" file becomes ready on "app > app-release.apk" path.
2. Gateway Installation
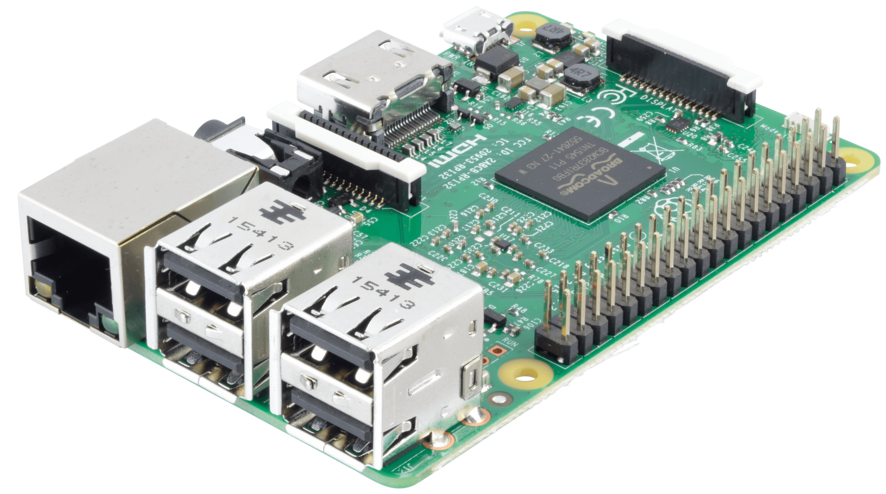
Step 1 : Raspberry Pi 3
This application works on Raspberry Pi 3. To use this project, you need to purchase a Raspberry Pi 3. You can easily obtain this device from many company.
Step 2 : Set-Up Android Things
Step 2.1 : Install Android Things
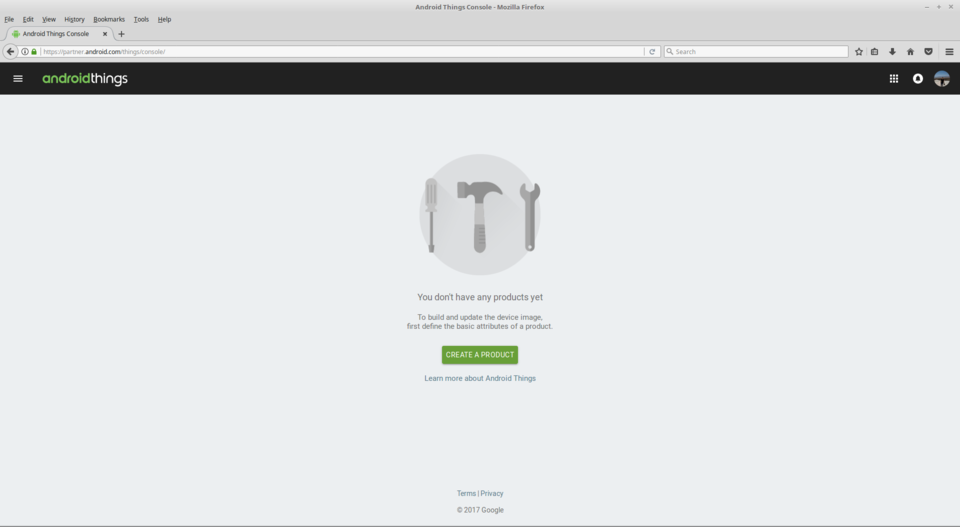
The operating system used in the device is set to "Android Things OS" and the codes are written according to this system. To download this operating system, go to https://partner.android.com/things/console/.
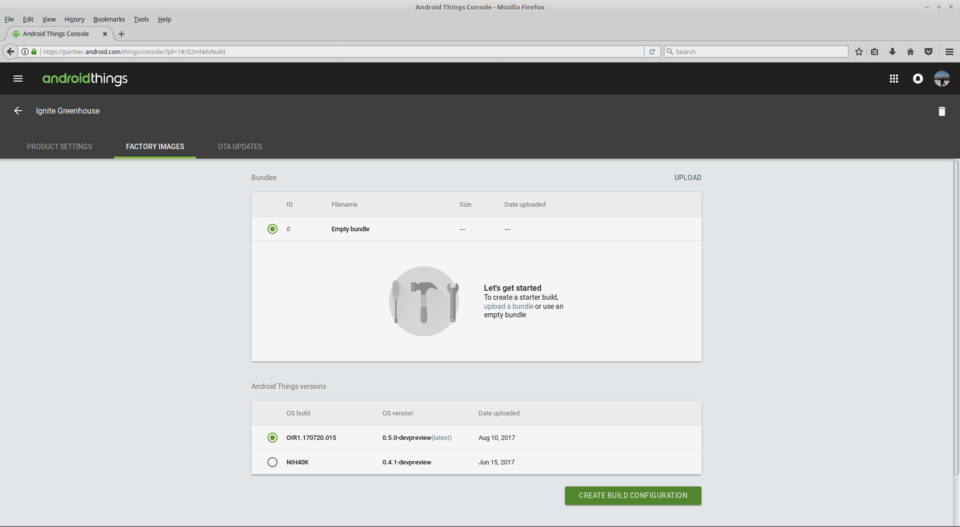
Click CREATE A PRODUCT button on the screen.
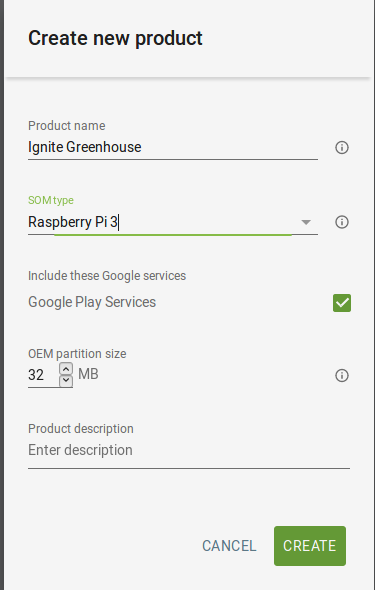
Fill in the required fields and press the CREATE button on the window.
Click FACTORY IMAGES.
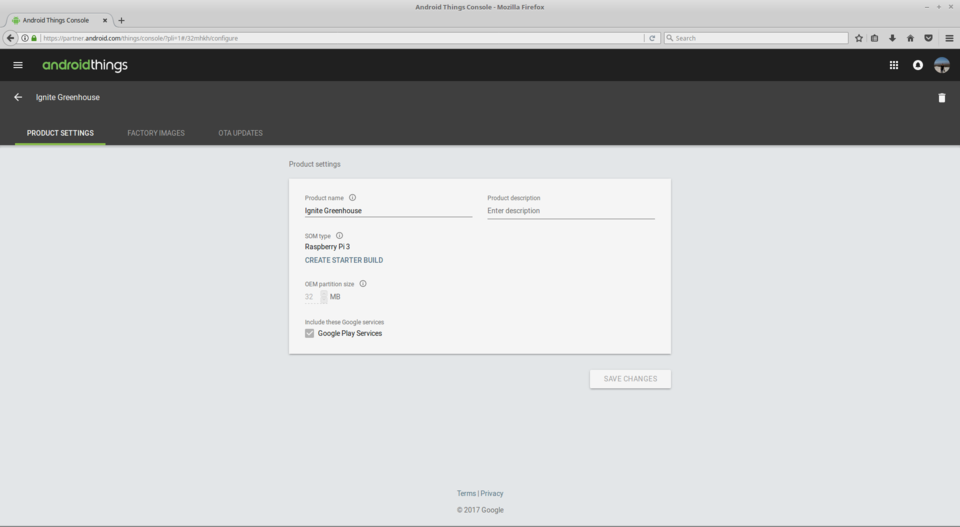
Click CREATE BUILD CONFIGURATION button.
After finishing the process, "Build configuration list" will appear below the page. Click here "Download build" link then downloading will start.
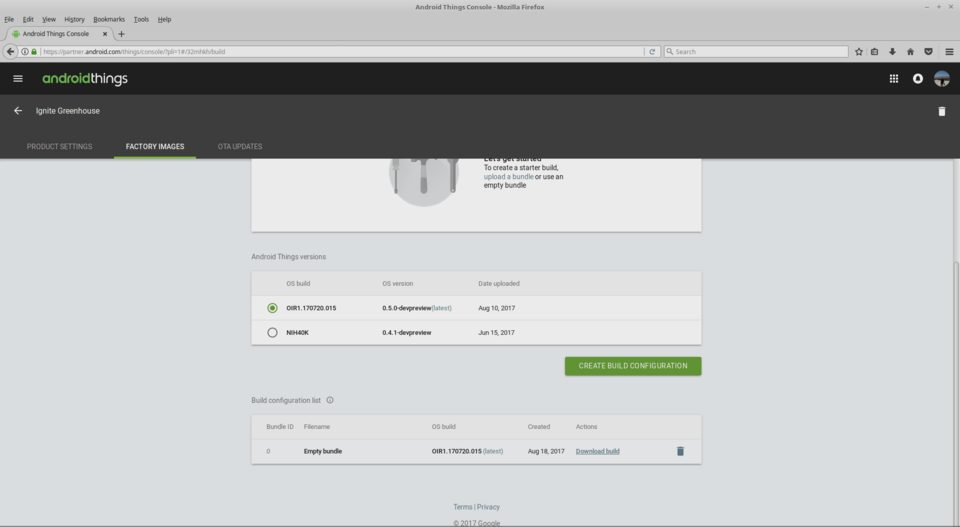
Step 2.2 : Download Android Things
We extract the compressed file and install it on the SD Card. These operations can only be done using methods specific to your operating system. You can learn how to install by choosing your operating system below.
Step 2.3 : Android Things Configuration
After installing Android Things, Wi-Fi settings need to be done. For this, go to https://developer.android.com/things/hardware/raspberrypi.html#connecting_wi-fi
Step 3 : IoT - Ignite Agent Installing
Iot-Ignite is the cloud system of our project. The remote control mechanism operates through this system.
Step 3.1 : IoT - Ignite Creating an Account
In order to use this platform, it is necessary to create an account first. Go to
https://devzone.iot-ignite.com/dpanel/signup.php?page=development to create an account.
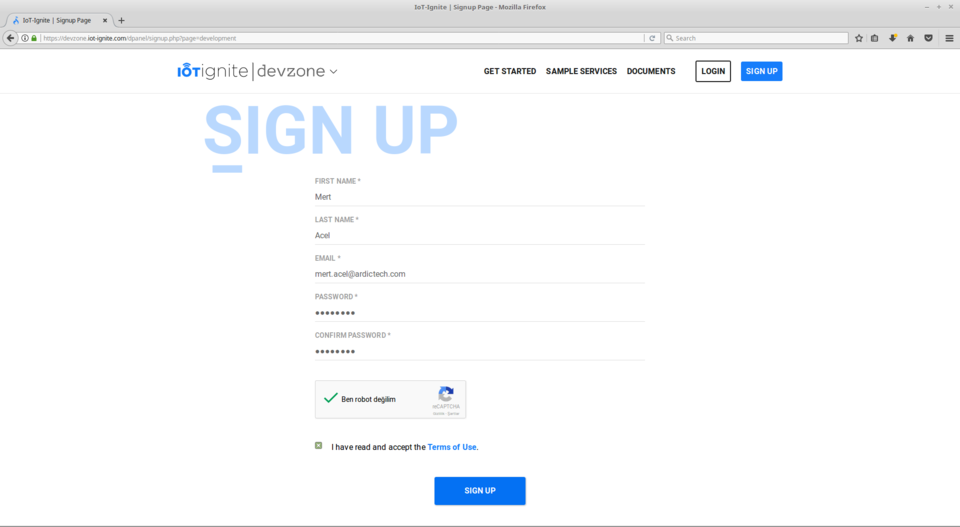
In the window that appears, fill in the information and press SIGN UP.
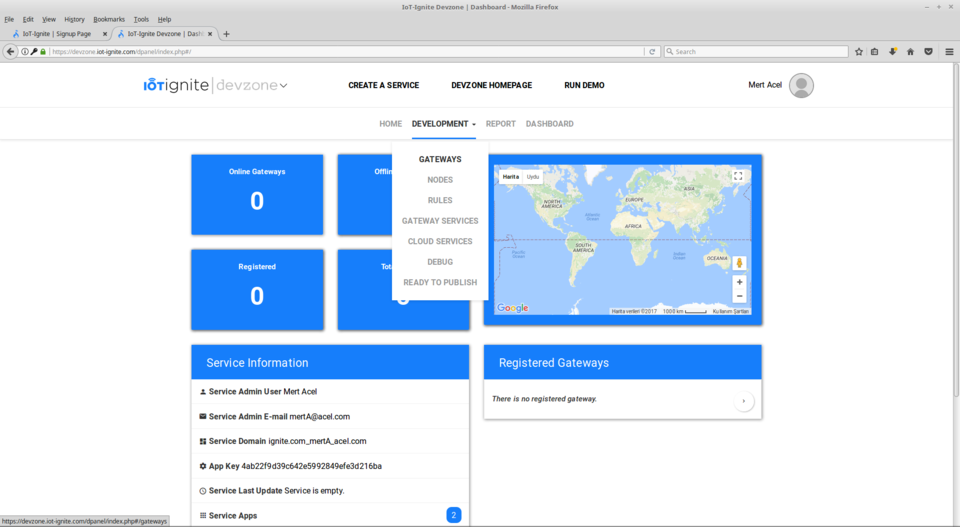
Step 3.2 : Install IoT - Ignite Agent
After registration, the home screen will come up. Click the DEVELOPMENT > GATEWAYS section.
Click REGISTER A GATEWAY button.
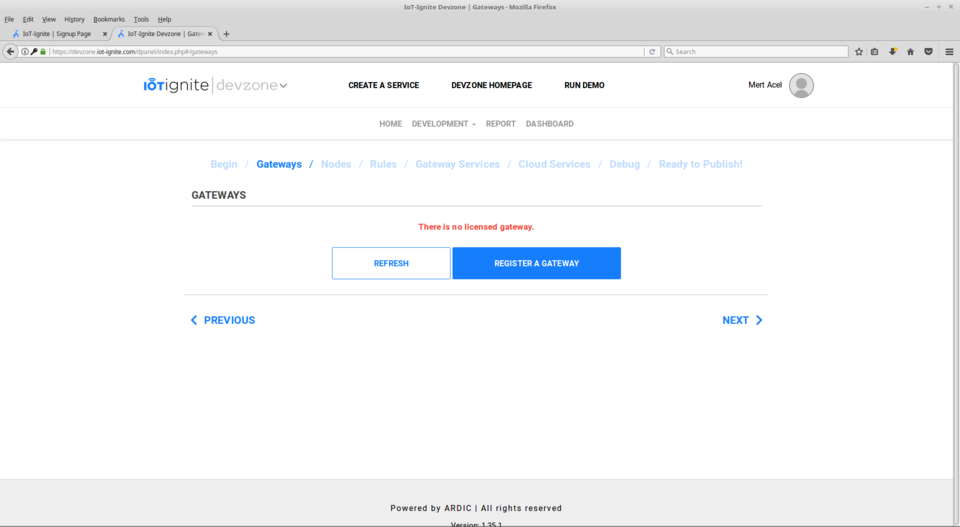
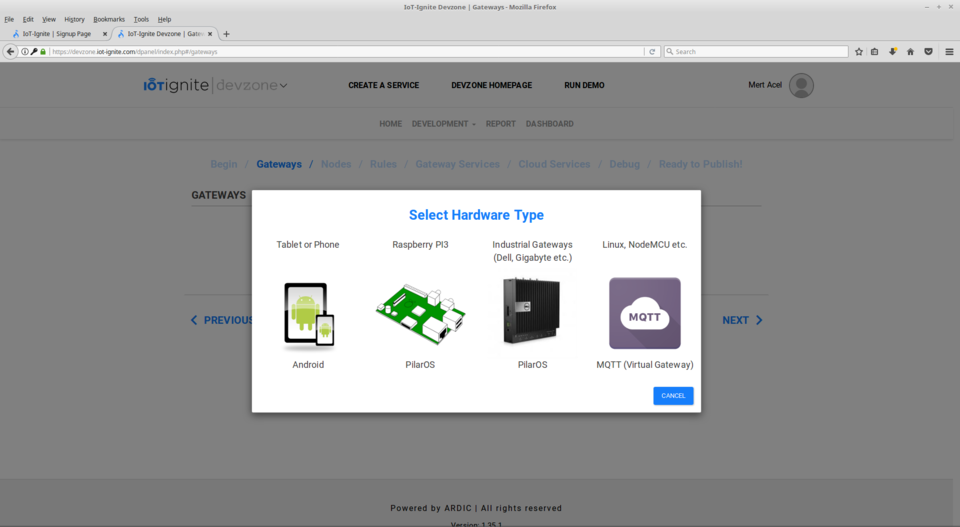
Select Android.
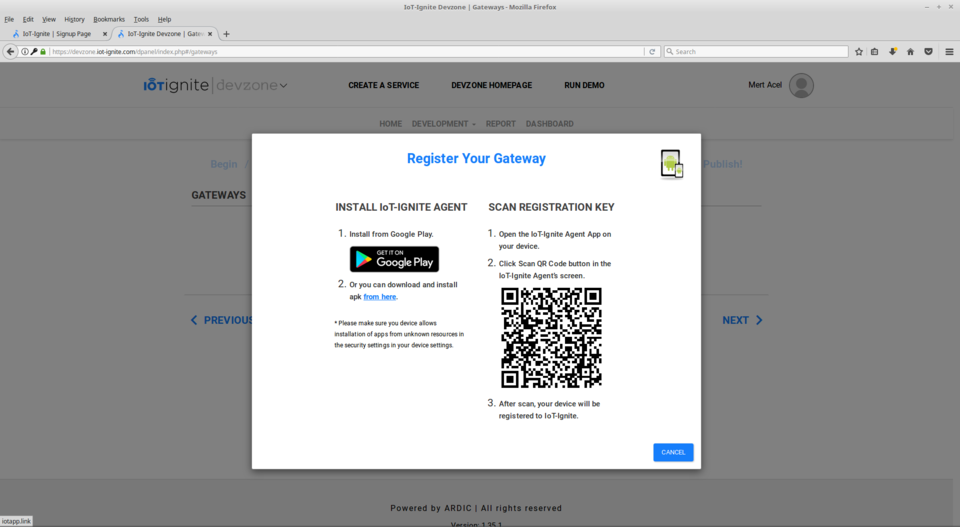
Click the from here link.
Click the link that include .apk extension.
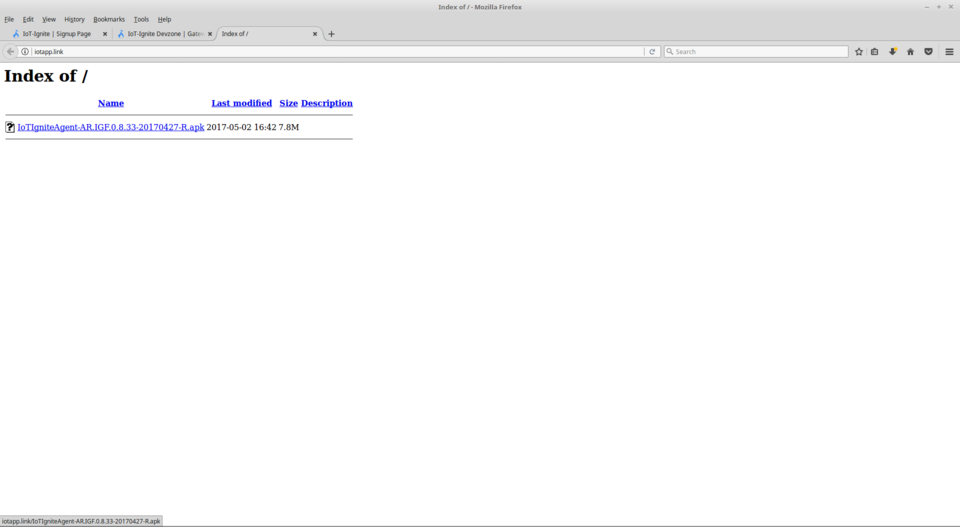
Step 3.3 : Download Agent
As a first step, you need to connect to the device via Wi-Fi. Type the IP address of your Raspberry Pi device after the adb connect statement. This command is used to access the device.
adb connect 192.168.2.79
adb shell
GreenhouseSSID is the name of our network, 123456 is the password. You can change it for yourself.
am startservice -n com.google.wifisetup/.WifiSetupService -a WifiSetupService.Connect -e GreenhouseSSID -e 123456
Reboot the device.
Perform the installation IoT-Ignite Agent process when the boot completed.
adb connect 192.168.2.79
adb install -r IoTIgniteAgent-AR.IGF.0.8.33-20170427-R.apk
Step 3.4 : Download Greenhouse Gateway Application
We upload the project file we have compiled with the signature before with this command.
adb install -r app-release.apk
adb shell
We are only running this program for a while.
am start -n com.ardic.android.ignitegreenhouse/com.ardic.android.ignitegreenhouse.activities.MainActivity
After these commands, Gateway will be ready.
Step 4 : Registering
Gateway is now ready for use but it is necessary to perform the licensing procedures to transfer the data to the cloud. For these operations go to https://github.com/IoT-Ignite/IgniteGreenhouse to download and install the Ignite Greenhouse App on an Android phone or tablet. It will ask for username and password information first. Enter the username and password of the IoT - Ignite platform you were previously registered with.
Now go to : http://www.qr-code-generator.com/
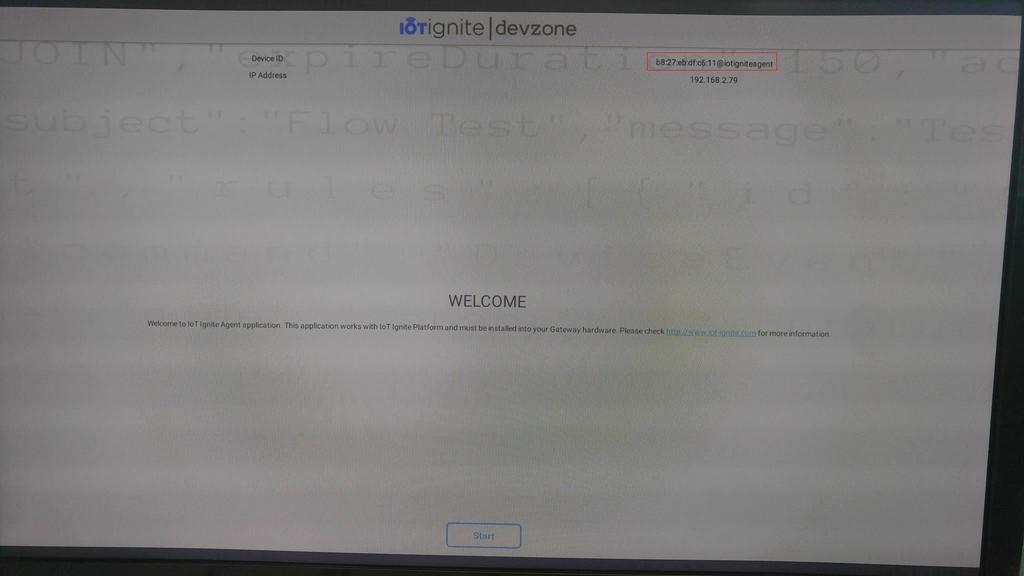
On the Qr Code Generator page, enter the Device ID code in the upper right corner of the screen connected to Raspberry Pi.

After clicking Create QR CODE button, then scan the code appeared right on the screen via Ignite Greenhouse App.
The licensing process is complete.
Step 4 Signing :
The last step is to use our product. We will sign the app in this step. This step was created by IoT - Ignite for security reasons.
We will notify IoT - Ignite the project we have compiled with the signature.
Login with your username and password you created earlier on: https://enterprise.iot-ignite.com/v3/access/login
We are logging into the apps screen with Applications > App Store > Categories section.

There are categories on the screen. We use DEFAULT. Click Applications button.

Click Add Application button.
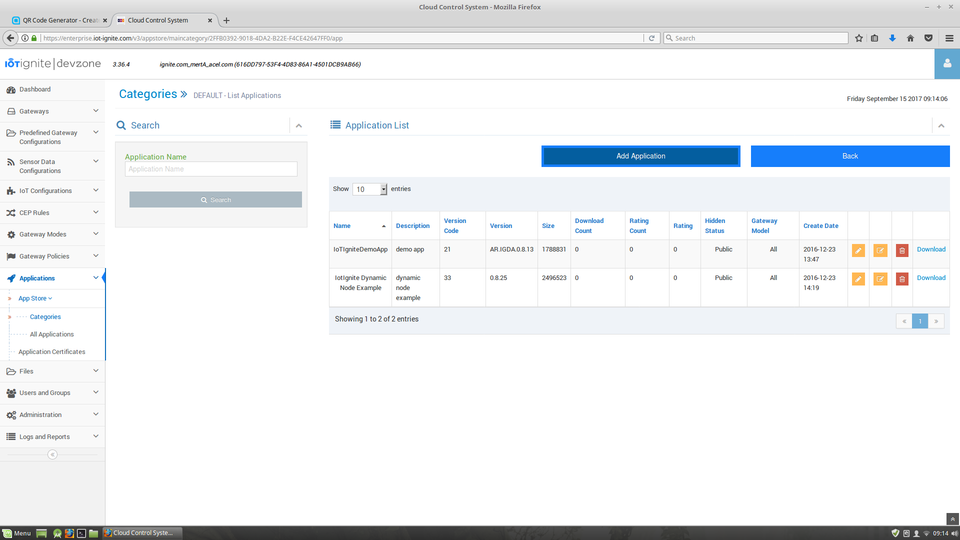
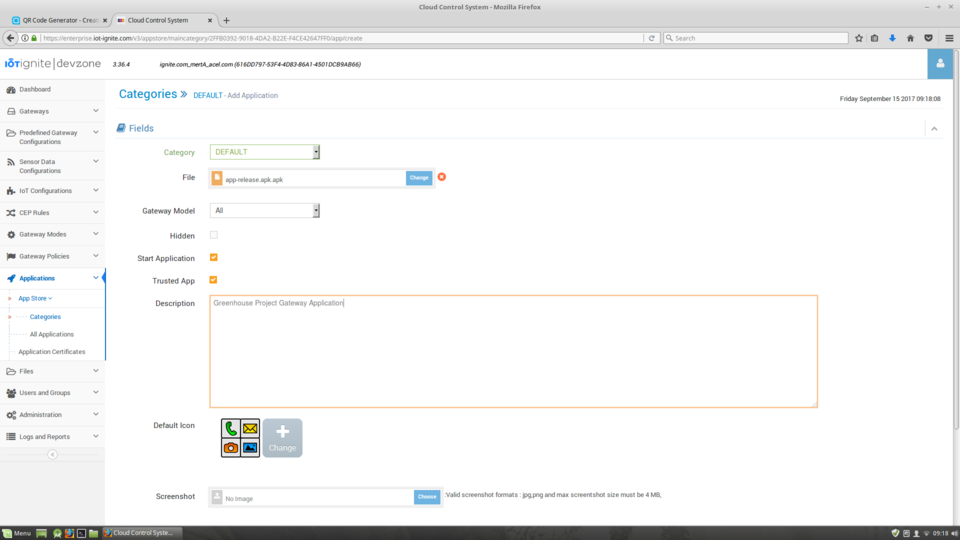
Here are the fields we need to fill in:
File : Ignite Greenhouse App .apk file path
Start Application : Start on boot?
Description
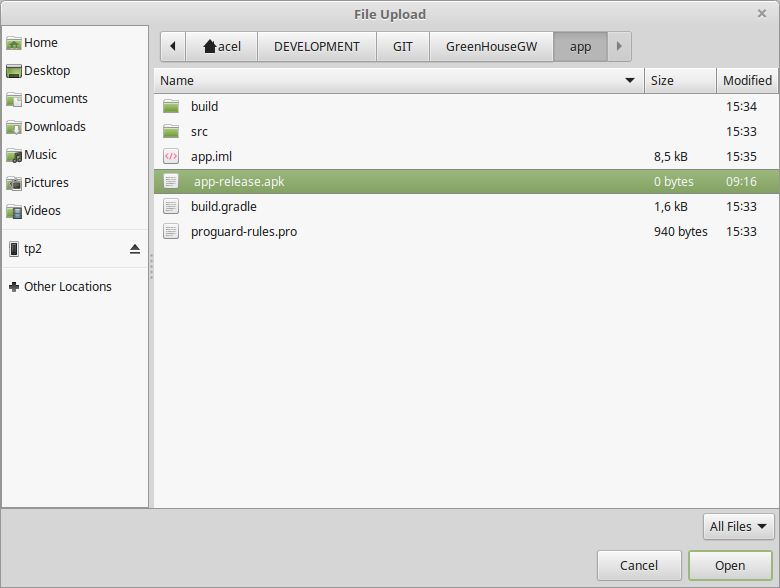
When we click Change button next to File, we are asked to select a file. We select the app-release.apk application that we have compiled with the signature in app folder and press Open button.
Click Upload button.

Step 4.1 Adding Mode :
The last action we need to do is to add Mode and send it to the device.
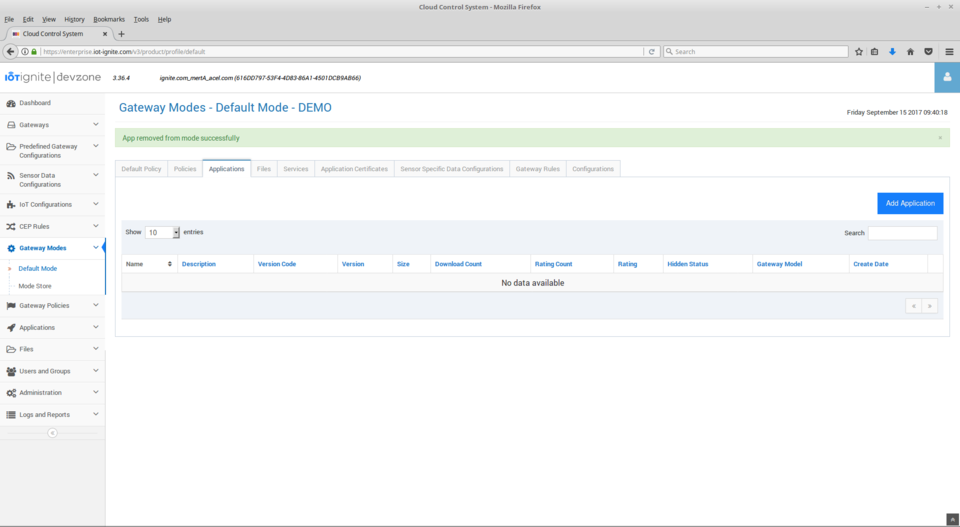
Enter mode screen from the section Gateway Modes > Default Mode

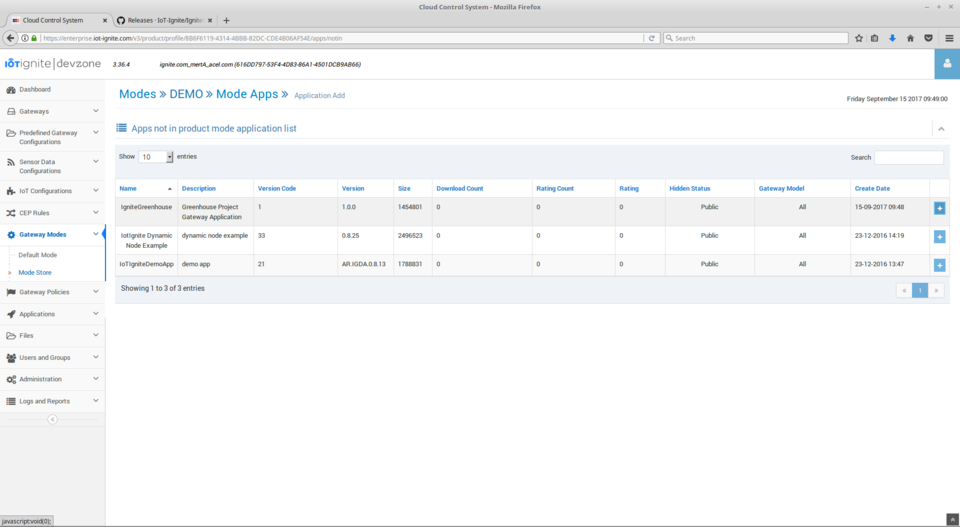
Enter Applications section and click Add Application button.
Click on the + icon next to the application.
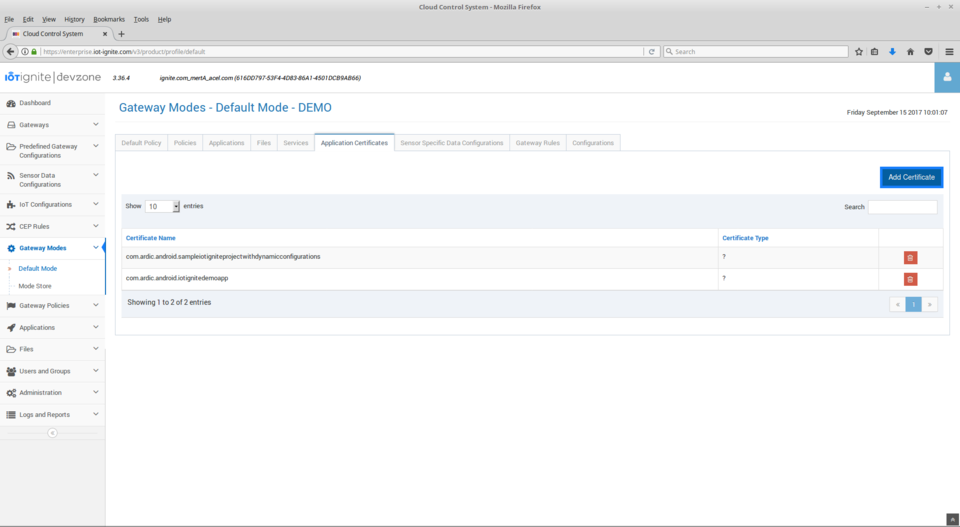
Click Application Certificates section. Click Add Ceritifitaces button.
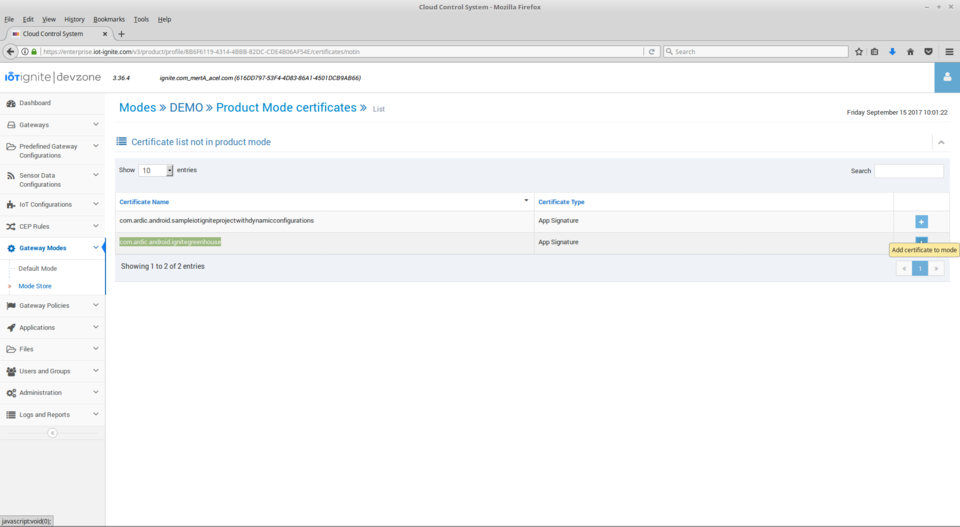
Click on the + icon next to the application.
Step 4.2 Sending Mode :
We will send Mode and finish our operations.
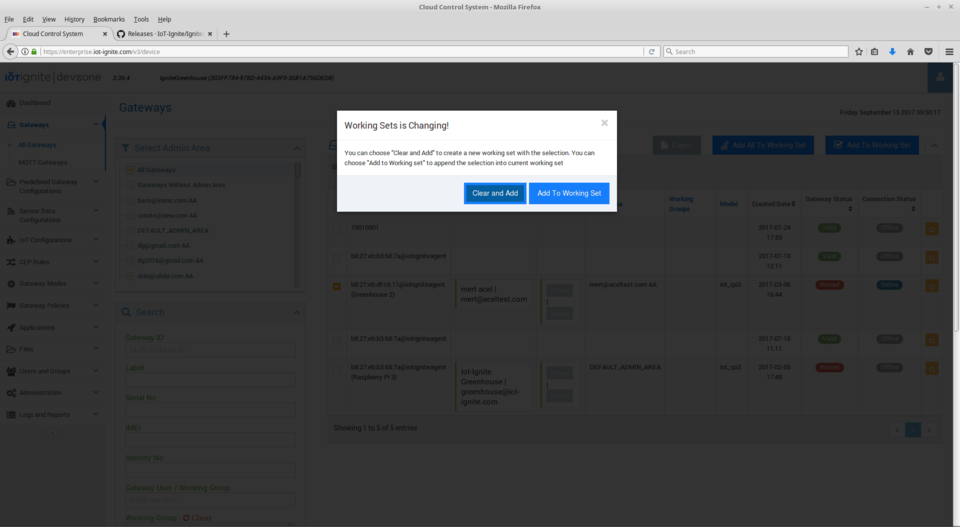
Follow Gateways > All Gateways section. You will see the number of your device on your screen. Mark the box on the left. Then click the Add To Working Set button on the top right. Click Clear and Add on the pop-up window.
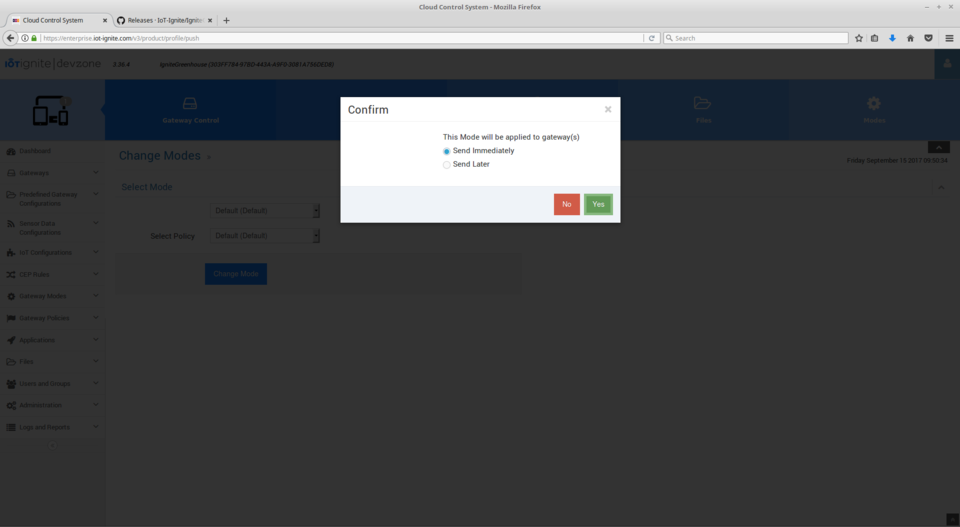
Then click on Modes in the top right. We select DEFAULT mode on the screen and click Change Mode button. We click the Yes button on the pop-up screen by selecting Send Immediately.
We're done.